GTV - Bài viết này mình sẽ hướng dẫn cách tạo widget bình luận mới nhất (Recent comments) cho blogspot. Vì với blogspot thì việc quản lý bình luận khá khó khăn, hoặc bạn phải thường xuyên theo dõi mail của mình và rất dễ bị spam mail vì thông báo bình luận từ trang web.
Với widget bình luận mới nhất này sẽ giúp bạn theo dõi những bình luận trên toàn bộ nội dung của blog mình, sẽ phản ứng kịp thời với những spammer hay trả lời nhanh nhất cho những câu hỏi của các bạn khác đặt ra trong các chủ đề của mình. Và widget bình luận này hiển thị cả avatar của blogger nhé 
Làm thế nào để tạo widget bình luận mới nhất cho Blogspot?
– Vào trang quản trị của bạn ở Blogger
– Tiếp tục chọn Layout (Bố cục), và chọn ví trí thêm widget bình luận mới nhất:
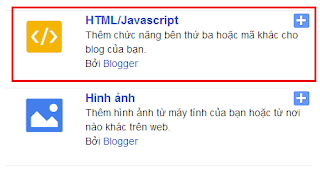
– Thêm HTML, JavaScript:
– Và paste toàn bộ đoạn code bên dưới này vào nội dung của HTML, JavaScript:
<style type=”text/css”>ul.ST_recent_comments{list-style:none;margin:0;padding:0;}.ST_recent_comments li{background:none !important;margin:0 0 6px !important;padding:0 0 6px 0 !important;display:block;clear:both;overflow:hidden;list-style:none;}.ST_recent_comments li .avatarImage{padding:3px;background:#fefefe;-webkit-box-shadow:0 1px 1px #ccc;-moz-box-shadow:0 1px 1px #ccc;box-shadow:0 1px 1px #ccc;float:left;margin:0 6px 0 0;position:relative;overflow:hidden;}.avatarRound{-webkit-border-radius:100px;-moz-border-radius:100px;border-radius:100px;}.ST_recent_comments li img{padding:0px;position:relative;overflow:hidden;display:block;}.ST_recent_comments li span{margin-top:4px;color: #666;display: block;font-size: 12px;font-style: italic;line-height: 1.4;}</style><script type=”text/javascript”>//<![CDATA[// Recent Comments SettingsvarnumComments = 5,showAvatar = true,avatarSize = 40,roundAvatar = true,characters = 40,showMorelink = false,moreLinktext = “More »”,defaultAvatar = “https://www.gravatar.com/avatar/?d=mm”,hideCredits = true;//]]></script><script type=”text/javascript” src=” https://googledrive.com/host/0B_1mqJd2tC8qdDdPb25PXzNiSUk”></script><script type=”text/javascript” src=”https://www.tranbadat.com/feeds/comments/default?alt=json&callback=ST_recent_comments&max-results=5″></script>
Trong đó, chữ màu xanh bạn sẽ thay bằng đường dẫn blog của bạn nhé. Còn 2 con số màu đỏ là số bình luận bạn cho phép hiển thị, có thể tùy chỉnh theo ý mình nhé. Và lưu lại!
Hãy F5 trang web của bạn và xem kết quả đi nào ^_^


